ShareThis

Monday, October 31, 2011

You say you want a revolution, well, you know.....

Hello my pretties!

Enlarge for sparkly goodness
Today I have a polish that is old - I'm well aware, but it is new to my collection! You see, as some of you may or may not know, Mama is moving to Boston. So, she went through her stash and picked out some of her pretties that she thought I'd like so she had to take less with her on her cross-country adventure. And she gave me none other than Color Club Revvvolution! YES, the holographic one! *SQUEE!!*

On top of being the awesomesauce that it in in terms of color, this puppy applies like a DREAM! Pictured is two coats, but I definitely could've gotten away with one. Two is just a habit, I guess.

Shade:


Revvvolution is a charcoal grey with teeny tiny holographic glitter in it. I'm aware that Color Club rereleased this but just as a shimmer? That's a bummer because this one is SO gorgeous!! Can you even get the holographic versions anymore? If not, I feel super duper lucky to have this one and think Mom is crazy for giving it to me...even if she does say she doesn't like it. :)


Revvvolution shot its way up into my top polish list just about instantly. I know I'm so so late to the party on this one but I thought I'd share it anyway just in case you haven't seen it... or wanted to again. :)

What's that, you ask? Why yes... I did take this picture in my car


Speaking of top polishes, Amanda from The Nail Polish Enthusiast and I were discussing doing a week of favorites -- favorite reds, favorite glitters, etc sometime in December. I also want to do a top polish list at the end of December. Would you guys be interested in seeing those or would you just pass them over? Be honest!!

Have a fabulous day!

Friday, October 28, 2011

Studio M Nouveau Vintage

I picked this bottle up at a recent trip to Meijer.  I've seen some people swatching it and liked the uniqueness of the color.  As you may (or may not) know, Studio M is marketed by the same company that produces Color Club polishes, hence the identical name and color. 

So, anyway - I thought it looked unique.  But as you'll see in the comparison shots below - it's not really that unique at all! :)

You can't really tell by looking at the bottle or nail pictures, but Nouveau Vintage is actually gold and greenish glitter in a RED base.  Check out the neck of the bottle while you're applying it, you will see the hint of red.  You can't see the red base once it dries.  I think I applied 2 coats and coverage was good.  It's a nice antique brass-y looking shimmer and a good fall color. 


Now, on to the comparison photos.  I compared this color with others from my stash.  


Left to Right Studio M Nouveau Vintage, Nina Ultra Pro Mossy Britches, Revlon Insta Dri Bronze Ablaze and Butter London Wallis.  The closest match is the Sally Hansen Bronze Ablaze.  Mossy Britches and Wallis have a lot more olive in them with Wallis being more shimmery than the other swatches.  Can you see the hint of red in this comparison shot?


Nouveau Vintage, Mossy Britches

Bronze Ablaze, Wallis

So my final verdict is that if you already have one of the other shades pictured, you can pass on this color.  They are not dupes, but close enough that only another nail blogger could see any difference in color among them.

Cheers!

Thursday, October 27, 2011

Nutra Nail Gel Perfect UV-Free Gel Color How to & Review

Today I have something a little different to show you guys -- The Nutra Nail gel kits.


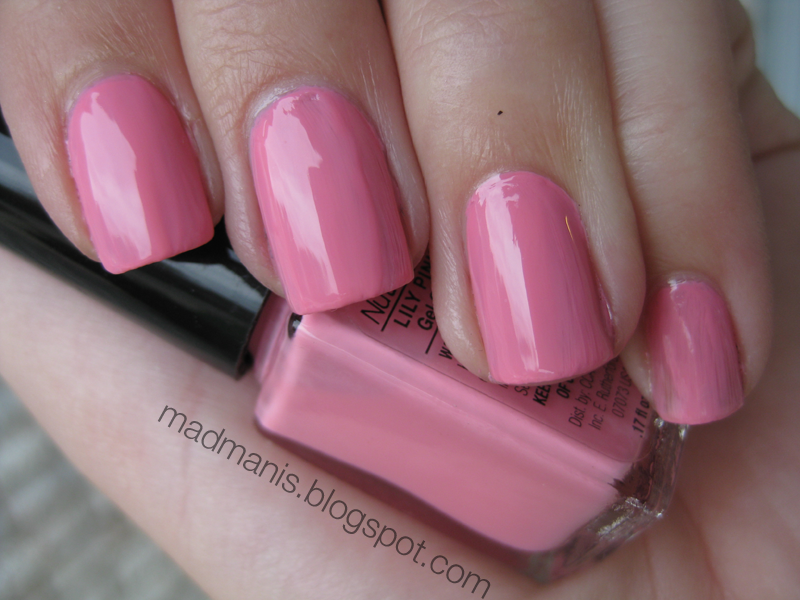
These kits come with three products -- an activator, the gel color, and a brush cleaner. The color I am going to show you today is Lily Pink.


How do you use them, you ask? Well you're in luck because I am going to tell you!

(WARNING: These pictures are not neat! Do not be alarmed :) 

How To:

First of all, make sure all the caps are off on the bottles. You need to work quickly with these and unscrewing everything is going to cause your everything to dry before you are finished.


Next, what you want to do is apply the activator so it looks as if your nails are wet. The instructions specifically state to only do one hand at a time.


Next, you want to apply the gel color in thin coats while the activator is still wet. It's very important to not let the activator dry. The gel color will go wherever you painted the activator, so take caution not to get any of it on your cuticles and be careful not to flood your nails (I speak from experience). The instructions say the first coat will be streaky....but ALL of my coats were streakier than all get out.

I know, they are a mess. It was hard to use okay?! :P


You want to put the gel color in the cleaner polish once you finish one hand. First remove the excess gel color polish on a paper towel. Then, place the gel color top in the cleaner and cleaner cap in the gel color (to be used as your brush for the next hand). Then repeat on the other hand (activator, color, cleaner).


Repeat as many times as necessary to make the color opaque.


Now, onto the review of this...

I won't even beat around the bush. I was really disappointed in this product. It smells FOUL -- it has a very chemically smell and it actually gave me a headache by the time I was done (i.e.: gave up). If regular nail polish smells strong to you, this could very well be unbearable! I'd recommend doing them outside or somewhere with good air flow because the smell of this product is overwhelming.

The instructions state that the first coat of color will be streaky, but my entire mani was streaky. You have to have a VERY steady hand when doing this because it's easy for brush strokes to show through, as you can see in my pictures (I warned you!)

Also, like I said, make sure to be really careful when applying both the activator and the color. I flooded my cuticles on more than one nail and it was disastrous. Because the activator/color dry so quickly, it's tough to clean up with acetone and a brush. Imagine trying to remove dried concrete from your nails with a little eyeliner brush - that's how hard it was to clean up.

As for the wear, I can't tell you how long they last because I removed mine immediately after taking pictures. The product packaging reads, "Perfectly strong. Perfectly beautiful. And out the door in 5 minutes!" Upon researching a little though, I found that the product is getting some flack for not holding up like real gel nails should. People are experiencing cracking and chipping within a day, which defeats the purpose of a gel manicure in my opinion. Isn't the point of gel manicures that they're long lasting? Well, this product isn't.

The color of this isn't even anything extraordinary -- it's your regular ole run of the mill Barbie pink. I'd prefer to just paint my nails with a regular Barbie pink polish than waste my time (and money!) on this product.

Final Verdict:

These just aren't for me, but I can see where someone who doesn't change their polish every other day (like me) would benefit from this product. With practice, they might look better. However for me, the entire process as well as the final outcome was just not worth it. I might be able to get over the hassle of the application process if it looked good in the end, but it didn't. The polish was all streaky and the texture of my nails weren't smooth-as-glass like I like them to be (SV, I'm looking at you!) Plus, for the price of these (~ $12) you might as well just get them done at a salon where you know they'll look good instead of like a 5-year-old did them.

Also, if you are someone who kind of slops polish on when you're doing your nails then cleans up afterwards (like me), these might not be for you. The activator is very unforgiving so if you get any polish on your cuticles or have any flooding it's going to be a nightmare to clean up. I found that if you DO get any activator or polish on your cuticles or on the skin next to your nails, clean it up with acetone and a brush RIGHT AWAY. Don't wait until you have the whole hand done, because it will have dried to concrete by then. Luckily, you can use the foil method to remove the full mani and they come off pretty easily.

Will I use this again? Definitely not on my fingernails. I might try it on my toenails since I hardly change the color on my toes.

Nutra Nail UV-Free Gel Color Kits are available at drugstores or at http://nutranail.com for around $12. They're available in 12 shades on the website, but I only saw a few of them at my local Walgreens.

Have you guys tried this product? What are your thoughts on it?

This product was given to us for review purposes. Please see our Disclosure Policy for more information.

Wednesday, October 26, 2011

OPI Nicki Minaj Press Release

Pink Everyday!

OPI Partners with Platinum Recording Artist Nicki Minaj to Launch Limited Edition Lacquers

 OPI announces the launch of six new limited edition shades inspired by hip hop sensation Nicki Minaj, including a purple Shatter!  Inspired by Minaj’s unique style, love of bright colors, and her debut album Pink Friday, the Nicki Minaj by OPI promotion will feature an array of bold hues, from neon lime green to pink.

 “OPI is so excited to work with Nicki in releasing these six new nail lacquers,” said Suzi Weiss-Fischmann, OPI Executive VP & Artistic Director.  “Nicki has taken the hip hop world by storm, but her music is only part of the equation. She’s also become a fashion inspiration, noted for her daring costumes and hair color both on and off the stage.”

Nicki’s eclectic look made including a new hue in OPI’s bestselling Shatter coat a must for this collaboration. The purple Super Bass Shatter (a record-setting purple that “shatters” before your eyes) is inspired by graffiti art and works when painted over any dry OPI hue. Adding top coat takes Super Bass Shatter from matte to glossy in seconds.

The line features five nail lacquers in addition to Super Bass Shatter, ranging from fantastic pink, rainbow confetti glitter and charcoal sparkle hues to two green shades in lime and teal:

Pink Friday
Kick off the weekend with this pop! of bubblegum pink.


Metallic 4 Life
This charcoal sparkle flies with the stars in the skies.


Save Me
I drove for miles just to find this silver-rainbow glitter.


Fly
I came to win, to fight…and to wear this aqua.


Did It On ‘Em
A lusty little lacquer that loves the “lime”-light.


Super Bass Shatter


I am so excited for these! They look fun :)

Orly Orange Punch

I saw this Halloween design over on another blog - omgnoodles - and loved it so much I've recreated it here.   So head on over there and check Pauline's cute manis!

This is a base of 3 coats of Orly Orange Punch stamped with Bundlemonster plate 213 and Konad special polish in Black.  Then the whole thing is topped with a couple coats of China Glaze Magic Matte.  I wore this mani almost a whole week, which is simply unheard of for me!

Hope you like it, and thank you to Pauline for the cute idea!


Tuesday, October 25, 2011

Sally Hansen Salon Effects - Ghoulie Girl

Hi all. Today I am showing you the Sally Hansen Salon Effects strips in Ghoulie Girl.


I had never tried these strips until last night. I picked these up a few weeks ago at Walgreens and wanted to wait until closer to Halloween to use them. I have heard such good things about these strips -- unfortunately I can't agree with all the positive feedback.

The Ghoulie Girl strips are comprised of little orange and white ghosts on a black background. You get 16 strips in varying sizes in one pack. I've heard of people being able to get two nails done with one strip, but I am not so talented as to be able to do that.

Let's start with the positive -- the design is REALLY cute! And definitely not something I'd be able to recreate on my own, so the strips are good for that. They let people who aren't as good as nail art still have cute designs on their nails with minimal (kind of..) effort.


So what didn't I like about these? Well, first of all, I ripped one of them down the middle trying to get it off the backing. My nails are almost ALL between sizes so I got pieces of the strips on my skin and had no decent way to remove them besides scraping the excess off with an orange stick. Which made the sides all rough and jaggedy. Also, when I tried to file the excess off of the tip of my nail, it wouldn't make a clean cut. The tips of my nails are still all sharp and jaggedy and I feel like I messed up the shape of my nails trying to just get the extra strip off the ends.

They took FOREVER for me to put on (which I'll admit is probably because it was my first time using them) and I feel like I could've done three manis in the time it took me to apply ten nail decals.

I DO think these are cute, and they're a good alternative to doing your own nail art... I just don't think I'll be repurchasing. Especially for ten bucks a box. When I only got one mani out of it. And I don't think I'll be wearing these any longer than I would a normal mani. In fact, they probably won't stay on a day because I can't stand how there's little pieces of nail decal floating around on the tips of my nails and stuck to my skin.

At least they look cute?

What do you guys think of the Salon Effects strips? Do you like them? I think I'm probably the only person ever that has hated these :(

Monday, October 24, 2011

My first stripe mani ever!


 Ever since the 30 day challenge began, I've been wanting to do a stripe mani. I've seen so many cute ones and thought it would be pretty simple to execute. Today, I finally took that plunge into the land of the stripe mani!


I started with a base of Zoya Veruschuka (which is AWESOME OMG). Then I placed a large stripe of Zoya Jem down all the nails in varying places on each. The other stripe colors I used are just Kiss nail art stripers in white and silver.


I am very happy with this look! It was really easy and did not take me long to do at ALL. Next time, hopefully I can get the lines at my cuticles a little bit straighter. I was in no mood for precision when I did this.


Do you girls like stripe manis? What do you think of my easy peasy stripes?

Have a wonderful day! :)

Friday, October 21, 2011

Another BCA Mani

Hi all! Today I'm deviating from my Halloween nail art mode and showing you a Breast Cancer Awareness mani I did last night.

I know this is late in the month, but I at least wanted to get one in before October is over. I especially wanted to do this mani to pay tribute to my boyfriend's mother -- she beat breast cancer about 5 years ago. :)


I used Sinful Beautiful Girl and Wet 'n Wild How I Met Your Magenta for the base colors. I topped my ring finger with OPI I Lilly Love You and my pointer finger with OPI Teenage Dream (which I will never get tired of, EVER). On my other fingers I drew little ribbons. My dumb self wasn't thinking before I did my nails and I forgot that the BCA ribbon is pink... so I was forced to do it in a darker pink and it's kind of hard to see, but I still like it.

That's all for today ladies. Happy Friday!

Thursday, October 20, 2011

Simple Halloween Gravestones

Hi all! Today I have a Halloween design I've been wanting to do for a while -- little Halloween gravestones!


I started with a base of Ulta Little Black Dress to represent a spooky night sky. LBD is a black polish with small silver glitter in it. Here is a swatch:


Next I painted the gravestones with OPI French Quarter For Your Thoughts (the PERFECT gravestone color!). I just painted the gravestones straight with the polish brush. Paint like you would if you were doing a ruffian mani.

To make the gravestones look old and aged, I sponged a tiny bit of Sinful Colors Secret Admirer. I really like the way it made the gravestones look!

I used a small brush and black acrylic paint to draw on "RIP" on all of my nails.


Finish with some grass at the bottom (I used a green Sinful striper). Seal it with Seche Vite and voila! You're done :)


What do you ladies think of these simple gravestone nails? They were one of my most simple Halloween designs and they're at the top of my list! I guess intricate doesn't always mean better :)

Oh also, if you're arachnophobic, might want to turn away in 3...


2.......


1.....


I present to you, the rare Hoosier man-eating spider!

Happy almost weekend!

Wednesday, October 19, 2011

I always feel like... somebody's watching me..

Here is my attempt at jumping on the free hand Halloween nail art band wagon.  It's a simple mani done with China Glaze Liquid Leather and white, red and black acrylic paint.   Ooh very scary! ;-)


Happy Hump Day!

Monday, October 17, 2011

Zoya Neeka...

...is actually worthy of a full mani!


I know you guys have seen this one a dozen and one times... but I'm sharing mine too. I sat down to do my nails the other day, and didn't want to do ANY sort of nail art. Sometimes I just get in those moods. So I looked at my stash for a color that I haven't worn much, and Neeka jumped out at me. I swatched it with a couple other Zoyas that I received in one of their promotions, but I've never actually worn it!


Zoya is a greyish purple with little gold glass flecks. And it. Is. Awesome. This is only two coats here! The one thing I don't like about Zoyas though is that they always chip and wear on me SO fast. I don't know if it's because I don't use their base coat and stuff but it bums me out.


That's all, have a wonderful day!

Friday, October 14, 2011

BCA - Color Club Hot Like Lava & Fame and Fortune

Happy Friday everyone

Today's post consists of 2 of Color Club's new line - Hot Like Lava from the Foiled Collection and Fame & Fortune from the Backstage pass collection. 

Hot like lava is a vivid bright pink foil that applies like a dream.  The formula is great, it covers and levels extremely well and is similar to a creme in consistency.  You could use one coat if you so desired - I have used 2 here just to even out thin spots and for density of color.  Pretteh!


Layered over the top is Fame & Fortune from their Backstage Pass collection.  Fame & Fortune is a  mylar holographic flakie in a clear pink base.  The holographic particles really shine when they catch the light.  Typical of a mylar, there are issues with the little flakies poking up in spots and catching on hair, clothing, etc.  I actually ended up picking off the ones that were sticking up because it annoyed me so much.  But overall it's worth it because this polish is so pretty :)  I used 2 coats of Fame & Fortune - be sure to let it dry between coats so you're not just moving the particles around on your nail.  These pics are taken in my light box because it was early in the morning and the sun wasn't up yet so you can't see the full holographic effect of sunlight bouncing off the flakies! :(


Here is a stamping test for Hot Like Lava, applied over a white and black creme.  Coverage is a bit better over light colors.


Thanks for reading, have a lovely day!